
A loaf with a chocolate swirl is exactly what it sounds like: a tender, sliceable loaf where ribbons of chocolate run through the middle. Some versions are rich and buttery like babka. Others are simpler, like chocolate swirl bread or a marble-style loaf cake. People search this phrase for different reasons, including baking inspiration and even crossword clues, but the goal is usually the same: understand what it is and how to get that beautiful swirl that tastes as good as it looks.
This guide walks you through the types of swirled loaves, how the swirl actually works, the best ingredients to use, and step-by-step instructions for a reliable homemade version. You will also get practical, “real kitchen” tips to prevent the most common problems like leaking chocolate, dull swirls, or a dry loaf.
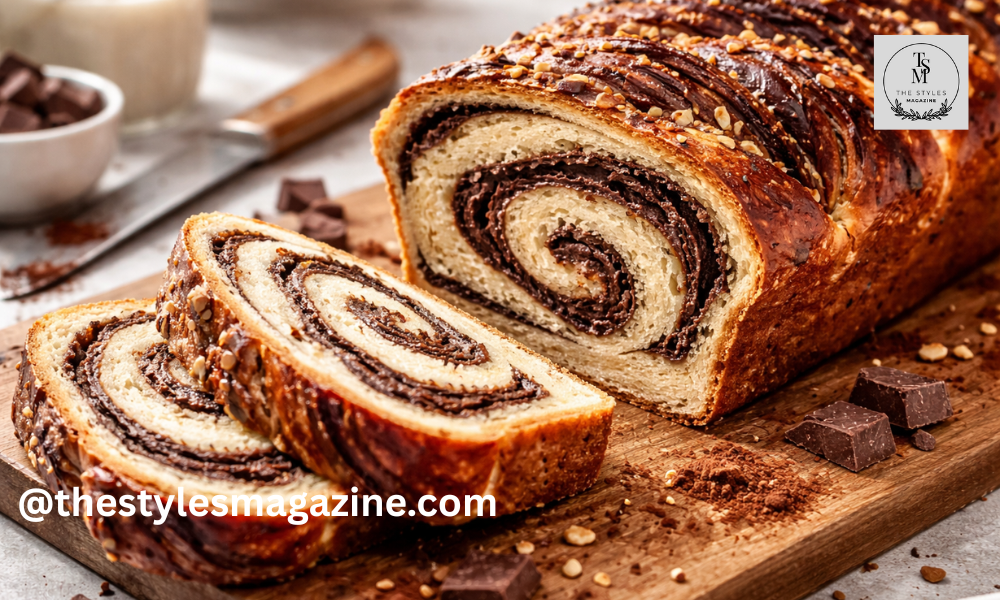
What Is A Loaf With A Chocolate Swirl?
A loaf with a chocolate swirl is a loaf-shaped baked good with a visible chocolate pattern inside. That pattern can look like a ribbon, a spiral, or a marbled design. The base can be:
- Yeast bread (soft, slightly chewy, sliceable)
- Enriched yeast dough (more buttery and sweet, like babka)
- Quick bread or loaf cake (made with baking powder or baking soda, softer and cake-like)
The “swirl” usually comes from one of these methods:
- Spreading chocolate filling over rolled dough, then rolling it up.
- Twisting or braiding dough with chocolate filling inside.
- Layering plain and chocolate batter, then swirling with a knife (marble loaf style).
All methods can taste great. The best choice depends on how much time you have and what texture you want.
Why This Keyword Is So Popular (And the Crossword Connection)
This phrase shows up online often because it fits a classic crossword clue style. Many crossword puzzles use short descriptions like “loaf with a chocolate swirl” to hint at a specific food name. The most common answer people associate with it is babka, which is a sweet, enriched bread with a chocolate swirl.
But not everyone searching this phrase is doing a puzzle. Many are simply looking for a recipe idea, a bakery-style loaf, or a clear explanation of the difference between chocolate swirl bread and babka. That’s why a helpful article should cover both: the meaning and the practical baking guide.
Babka Vs Chocolate Swirl Bread Vs Marble Loaf: What’s The Difference?
These three are often mixed up. Here’s the simple breakdown.
Babka (classic “chocolate swirl loaf”)
Babka is made with an enriched yeast dough, meaning it includes ingredients like eggs, milk, butter, and sugar. That makes it soft, rich, and slightly sweet. It usually has a thick chocolate filling, and many versions are twisted or braided before baking.
Best for: a bakery-style dessert bread that feels special.
Chocolate Swirl Bread (simpler Yeast Loaf)
Chocolate swirl bread can be made with a basic bread dough or a lightly sweet dough. It tends to be less rich than babka and can be shaped as a simple roll-up loaf. It’s great for toast.
Best for: breakfast slices, sandwiches, and easy everyday baking.
Marble Loaf Cake Or Quick Bread
This version uses batter instead of dough. You mix vanilla batter and chocolate batter, then swirl them together. It’s usually the fastest method and has a soft cake-like texture.
Best for: a quick, sweet loaf with minimal effort.
If you want the most “iconic” loaf with a chocolate swirl look, go for a babka-style loaf. If you want the easiest slice-and-toast result, go for chocolate swirl bread.
What Makes A Clean, Pretty Chocolate Swirl?
A good swirl is not only about looks. It affects taste in every bite. The most common swirl problems come from two things: filling consistency and shaping technique.
The Filling Should Be Spreadable, Not Runny
If your chocolate filling is too thin, it will leak out and burn on the pan. If it’s too thick and dry, it won’t spread evenly and you’ll get patchy swirl lines.
A good chocolate filling should feel like a soft paste that spreads easily with a spoon or spatula.
The Dough Or Batter Needs Structure
A swirl stays visible when the base is strong enough to hold it. With yeast dough, that means proper kneading and proofing. With batter, that means not over-mixing and keeping both batters similar thickness.
Temperature Matters
Warm filling melts too fast and smears. Very cold dough can crack and tear. You want a “cool but workable” dough and a filling that is room temperature and spreadable.
Ingredients For A Better-Than-Bakery Chocolate Swirl
You can make a loaf with a chocolate swirl in many ways, but these ingredients usually give the best flavor and texture.
For The Loaf Base (babka-style Or Enriched Swirl Loaf)
- Flour (all-purpose works well for most home bakers)
- Yeast (instant or active dry)
- Milk (adds softness)
- Eggs (richness and structure)
- Butter (tender crumb and flavor)
- Sugar (light sweetness)
- Salt (balances sweetness and boosts flavor)
For The Chocolate Swirl Filling
You have a few solid options:
- Cocoa + sugar + butter: classic and easy to control
- Melted chocolate + butter: richer, more intense
- Chocolate spread: convenient, but needs thickening sometimes
If you use a chocolate spread, keep it in a slightly thicker layer and leave a border around the edges so it doesn’t leak out during rolling.
Optional Add-ins That Make It Feel Premium
- A pinch of espresso powder in the filling (makes chocolate taste deeper)
- Vanilla in the dough
- Chopped toasted nuts for crunch (walnuts and pecans are common)
- Orange zest for a fresh, bakery-style aroma
Step-By-Step: How To Make A Loaf With A Chocolate Swirl (babka-style Method)
This method is written in a simple, practical way. It’s not meant to be complicated. The goal is a reliable loaf with bold swirl lines and a soft crumb.
Step 1: Make A Soft, Enriched Dough
Mix flour, yeast, sugar, and salt first. Add warm milk and eggs, then mix until it comes together. Add softened butter and knead until the dough becomes smooth and elastic.
A quick way to check: the dough should feel soft and slightly tacky, but it should not be a sticky mess. If it’s too sticky, add a small amount of flour. If it’s too dry, add a spoon of milk.
Step 2: First Rise Until Puffy
Place the dough in a lightly oiled bowl, cover it, and let it rise until it looks noticeably bigger and airy. In a warm kitchen this can take around 1 to 2 hours, sometimes longer.
A good sign it’s ready: when you press a finger lightly into the dough, the dent should slowly rise back but still remain faint.
Step 3: Make The Chocolate Filling
Mix your filling until it becomes a smooth, spreadable paste. If it looks runny, chill it for a few minutes and stir again. If it looks too thick, add a little melted butter and mix.
The goal is a filling you can spread without tearing the dough.
Step 4: Roll Out The Dough Evenly
Lightly flour your surface. Roll the dough into a rectangle. Try to keep it even thickness. Uneven rolling can cause uneven baking and messy swirl lines.
Step 5: Spread Filling And Leave A Border
Spread the chocolate filling across the dough, but leave about 1 inch clear along one long edge. That border helps seal the roll so chocolate doesn’t squeeze out.
If you want extra swirl contrast, you can sprinkle a small amount of cocoa and sugar over the filling. Keep it light.
Step 6: Roll Into A Log And Chill Briefly
Roll the dough into a tight log, starting from the filled side and ending at the clean border. Pinch the seam closed.
Now here’s a tip that helps a lot: chill the log for 10 to 20 minutes. This firms up the filling and makes the next step cleaner.
Step 7: Slice And Twist For Big Swirl Lines
Use a sharp knife to slice the log lengthwise down the middle. You’ll see the layers right away. Place the two halves cut-side up and twist them together gently, keeping the cut layers visible.
Don’t over-twist. A gentle twist looks better and keeps the loaf from tearing.
Step 8: Second Rise In The Loaf Pan
Place the twisted dough into a loaf pan lined with parchment. Cover and let it rise again until it looks puffy and slightly higher.
Second rise matters because it improves texture and reduces dense spots.
Step 9: Bake Until Set And Fragrant
Bake until the loaf is deep golden and smells rich and chocolatey. If the top browns too fast, cover it loosely with foil for the last part of baking.
Let it cool before slicing. Cutting too early can compress the crumb and smear the swirl.
My Practical Tips For A Sharp Swirl Every Time
These are the small things that make a big difference.
Chill Before Slicing
A short chill keeps the chocolate from oozing and makes the twist cleaner. This is one of the easiest upgrades you can do at home.
Use Parchment Like A Sling
If you line the pan with parchment with extra hanging on the sides, you can lift the loaf out easily. This prevents the swirl edges from sticking and breaking.
Don’t Overfill
It’s tempting to add extra chocolate, but too much filling usually leaks and burns. A balanced filling layer gives a prettier swirl and better slices.
Keep The Roll Snug, But Not Aggressive
If you roll too loose, you get gaps and uneven swirls. If you roll too tight, the loaf can tunnel or crack. Aim for “snug and even.”
Let It Cool Fully For Clean Slices
Warm swirl loaves are soft and delicate. If you slice early, the swirl can smear and the crumb can look gummy. Cooling gives you neat, bakery-style slices.
Common Problems And How To Fix Them
Even good bakers deal with swirl issues. Here are the most common ones and what to do next time.
The Swirl Disappeared Or Looks Faint
This usually happens when the filling layer is too thin or the dough is rolled too thick. Next time, spread the filling more evenly and roll the dough slightly thinner.
Chocolate Leaked Out And Burned
This often happens when:
- Filling was too runny
- You didn’t leave a border
- The loaf was overfilled
Fix: thicken the filling, leave a border, and chill the log before slicing.
The Loaf Is Dense
Dense loaf usually means the dough didn’t rise enough or the kitchen was too cold. Give it more time. Yeast dough is about “look and feel,” not strict clock timing.
Big Gaps Or Tunnels Inside
This can happen if you roll too tightly or if the second rise is too short. Let the loaf rise until it looks puffy before baking.
The Loaf Is Dry
Dry loaf usually comes from overbaking or slicing too early and leaving it uncovered. Next time, bake until just done, cool fully, and store properly.
Easy Variations You Can Try
Once you nail the basic loaf with a chocolate swirl, variations become fun and simple.
Orange-chocolate Swirl Loaf
Add orange zest to the dough or filling. It gives a fresh bakery aroma and balances the chocolate.
Nutty Chocolate Swirl
Sprinkle toasted chopped nuts over the filling before rolling. Toasting matters because it deepens flavor and keeps nuts crunchy.
Cinnamon-chocolate Swirl
Add a little cinnamon to the filling. Keep it subtle so it doesn’t overpower the chocolate.
Quick Marble Loaf Version (no Yeast)
If you want a faster loaf, make a vanilla batter and a cocoa batter. Layer them and swirl with a knife. This gives you a loaf cake style that’s great for quick baking days.
How To Serve And Store A Chocolate Swirl Loaf
A loaf with a chocolate swirl is best when it’s treated like something special, even if you baked it on a normal day.
Serving Ideas
- Slice and eat as-is for a soft dessert bread
- Lightly toast a slice and add butter
- Serve with coffee or tea
- Warm a slice for 10 seconds to bring out the chocolate aroma
Storage Tips
- Let the loaf cool completely first
- Wrap tightly to prevent drying
- Store at room temperature for a couple of days for best texture
- For longer storage, freeze slices (freezing slices is easier than freezing a whole loaf)
To reheat frozen slices, let them sit at room temperature for a bit, then warm lightly. Overheating can dry the bread.
Conclusion
A loaf with a chocolate swirl can mean different things, but the heart of it is the same: a soft loaf with rich chocolate ribbons in every slice. If you want the most classic version, babka-style shaping gives bold swirls and a bakery look. If you want something simpler, a basic swirl bread or marble loaf can still deliver that chocolatey, comforting bite.
Focus on two things and you’ll get great results: keep the filling spreadable (not runny), and shape the loaf with care (including a short chill before slicing). Do that, and you’ll end up with a loaf that slices cleanly, tastes rich, and looks impressive enough to serve to anyone.
FAQs
1) What Is A Loaf With A Chocolate Swirl Called?
Most commonly, it’s called chocolate babka, but it can also be chocolate swirl bread or a marble loaf depending on the recipe style.
2) Is Babka A Bread Or A Cake?
Babka is typically an enriched sweet bread (made with yeast), but it tastes dessert-like because of the chocolate filling.
3) Why Does My Chocolate Swirl Disappear After Baking?
Usually the filling layer was too thin, or the dough was rolled too thick, so the swirl blended into the loaf.
4) How Do I Stop Chocolate From Leaking Out Of The Loaf?
Keep the filling thick (not runny), leave a clean border around the dough edges, and chill the rolled log before slicing/twisting.
5) Can I Make This Without Yeast?
Yes. A marble loaf cake version uses baking powder/soda and gives a faster, cake-like result.
Does this article help you? Explore our website The Styles Magazine to find more helpful and fun stories that could help you.
Disclaimer: This article is for general informational and educational purposes only. Baking results can vary based on ingredient brands, oven accuracy, pan size, and kitchen temperature. Always follow food safety practices, check doneness carefully, and use caution when working with hot ovens, pans, and melted chocolate. If you have food allergies or dietary restrictions, review ingredient labels and adjust the recipe as needed.
The Magical World Of The Cream Berry Fairy: A Blend Of Folklore, Desserts, And Creativity